BLOG

How to Make an Epoxy River Table – Complete Step-by-Step Guide
This guide covers everything: wood selection, mold materials, the pour itself, and finishing. Whether you're building your first river table or your fiftieth, there's something here worth reading carefully.
Our experience
We have already built many projects over the last few years. The first one was a disaster — wrong wood, wrong mold, wrong timing on the pour. The finished slab looked more like a geological event than a dining table. But that's how you learn, and what I know now about the whole process could have saved me a significant amount of money and frustration back then.

Choosing Your Wood: The Decision That Determines Everything
The river table trend started with walnut, and walnut is still probably the most popular choice. The grain is dramatic, the color is rich, and the live edges are beautiful. But walnut is also expensive, and there's a good reason people use other species too.
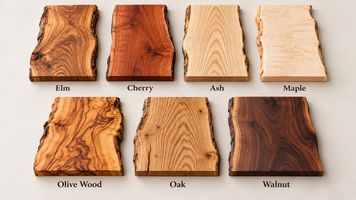
Popular wood species for river tables:
Walnut is the classic for a reason. The dark chocolate brown looks stunning against clear or colored epoxy. It has a tight, consistent grain that machines and finishes beautifully. The downside is the price — a matched set of walnut slabs for a dining table can run several hundred dollars before you've bought anything else.
Oak — both European and American varieties — is widely used and less expensive. The grain is coarser and more pronounced, which some people love and others find too busy next to epoxy. Oak's natural tannins can occasionally cause a reaction with some slower-curing epoxy systems, so test your system first on a scrap piece.
Cherry - deepens and darkens with age, and aged cherry alongside blue or teal epoxy makes for something genuinely striking. It's moderately priced and works well in smaller table formats — coffee tables, side tables.
Ash and maple - are lighter woods that pair well with colored pours where you want the wood to recede and the epoxy to be the focal point. Both are affordable and widely available.
Olive wood and elm - show up in European workshops — dramatic figuring, interesting colors, and wood movement that requires more careful drying. Worth the effort, but more demanding.
The Most Important Thing About Wood: It Must Be Dry
This is where most beginners go wrong, and it's non-negotiable.
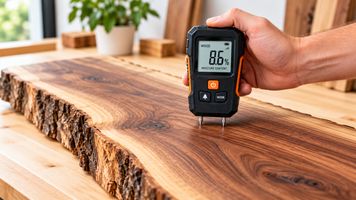
Wood moisture content needs to be below 8% for epoxy work — ideally 6% to 7%. If you pour epoxy over wet wood, two things happen.
First, the moisture reacts with the curing resin and causes cloudiness, bubbles, and poor adhesion.
Second, as the wood continues to dry inside the finished table, it shrinks and can crack the epoxy or pull away from it entirely.
Buy a decent moisture meter before you start.
They're inexpensive and will save you from wasting expensive resin on wood that isn't ready. Freshly milled slabs can take six months to two years to air dry to appropriate moisture levels, depending on thickness and species. Kiln-dried slabs are available from most hardwood dealers and are ready to use, but check them with a meter anyway — storage conditions vary.
The Wood Also Needs to Be Flat and Planed
The second most common beginner mistake: assuming that rough-sawn slabs are ready to pour against.
They're not. A rough slab has a wavy, irregular surface. When you lay it flat in your mold and pour epoxy against it, the epoxy follows every curve, dip, and undulation. Your "flat" table top ends up with an uneven surface that requires enormous amounts of sanding to flatten — if it can be flattened at all without breaking through the epoxy layer.
Before a slab goes into the mold, it needs to be:
Jointed or planed on the face (the side that will be the show surface)
Checked for flatness with a straightedge in multiple directions
The live edges cleaned of bark and any loose material (bark does not bond to epoxy reliably)
If you don't have a wide planer or router sled, most hardwood dealers will plane slabs for you at a modest per-cut charge. It's worth every penny.
Mold Materials: What People Actually Use — And What the Trade-Offs Are
This is a conversation worth having in full, because the choice of mold material affects your results more than most people realize.
Melamine-Coated MDF
The budget option. You build a box from melamine-coated board — a flat base with four walls — and use it as a mold. Epoxy doesn't bond well to the melamine coating, so release is possible, though not always clean.
Advantages: Cheap. Available at any building supply store. You can build a custom size with basic tools.
Disadvantages: MDF absorbs moisture. Even sealed MDF will flex under a large, heavy pour. The melamine coating can chip, leaving rough marks on your casting. A large MDF mold may bow in the middle, giving you a curved bottom surface instead of a flat one. And once you're done, the mold is usually destroyed in demolding. It's a single-use solution.
For small projects and one-off builds, melamine works. For anything over 60cm wide or if you're making tables regularly, you'll fight it constantly.
Laminated Foam and Foam Board
Some makers use rigid foam insulation board, laminated or coated with release agents. Very cheap, very lightweight. But foam compresses and deforms under the weight and heat of a large epoxy pour. The surface finish transferred to the casting is often poor. Not suitable for furniture-grade work.
HDPE Sheeting — DIY Fabricated
High Density Polyethylene sheet cut to size and fastened together. This is a step up from melamine and a legitimate approach, but the quality depends entirely on how well you build the mold. Getting tight, square corners that don't leak requires good construction technique. The base needs to be thick enough not to flex.
Works well if you're skilled at this kind of fabrication and need a specific size. The material cost is moderate.
Silicone Molds
Silicone has become popular in the hobby segment because it's available online in small sizes and looks easy to use. The marketing shows perfect releases, vibrant colors, clean results.
Here's the reality at furniture scale.
Silicone is flexible. That's its core property, and it's also its fatal flaw for large pours. A silicone mold for a 70cm-wide table will flex and bow under the weight and pressure of the epoxy. The base won't stay flat — it curves, it dips, and your beautiful pour cures with a wavy underside that needs to be ground flat before the table can stand without rocking.
Silicone also absorbs pigments. A purple pour leaves trace color in the silicone. Your next "clear" casting picks it up. This is manageable for small, decorative pieces where you're always using similar colors. For a professional workshop producing varied commissions, it becomes a constant problem.
Silicone degrades with heavy use and repeated thermal cycling. After twenty or thirty substantial pours, the surface of a silicone mold shows micro-tears and texture that transfers to your castings. It's a consumable.
For small projects — coasters, small wall clocks, decorative panels under 40cm — silicone is fine. For dining tables, conference tops, or anything in the 60cm-to-240cm range, silicone is the wrong tool.
HDPE Molds — Purpose-Made
HDPE — High Density Polyethylene — is what professional epoxy shops and serious furniture makers use. It's the same material used in cutting boards, food storage containers, and industrial applications where chemical resistance and dimensional stability matter.
Epoxy does not bond to HDPE. It releases cleanly, every time, with no release agent needed. That clean release gives you a glassy underside on your casting that needs minimal finishing.
The key advantage over silicone is rigidity. A properly made HDPE mold doesn't flex under the weight of a large pour. The base stays flat. Which means your casting comes out flat — actually flat, not approximately flat.
HDPE doesn't absorb pigments, doesn't degrade from repeated use, and doesn't react with epoxy systems. A good HDPE mold is a long-term tool, not a consumable. If you're serious about this work, it pays for itself quickly.
The one limitation used to be size — most purpose-made HDPE molds topped out at modest dimensions. That's changed. You can now get HDPE molds up to 95 inches by 48 inches (243 cm × 122 cm) as a standard product. That's an 8-foot by 4-foot casting surface — enough for a substantial conference table in a single pour.
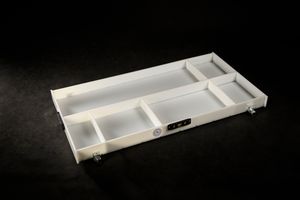
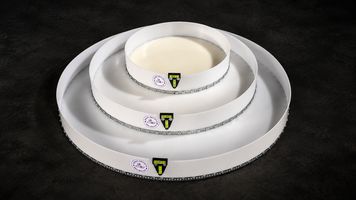
HDPE Mold 48" x 24" (122 cm x 62) with extra dividers
Tools and Materials You'll Need
Before the pour, make sure you have everything. Stopping mid-process to find a heat gun is not a good situation.
For wood preparation:
Moisture meter
Wide belt sander, drum sander, or router sled for flattening
Hand planer and card scraper for final surfacing
Orbital sander (80 and 120 grit)
For mold setup:
HDPE mold in the correct size
Silicone sealant (acetoxy-cure works well; allow 48 hours to cure)
Spirit level — most purpose-made molds include one
Painter's tape for masking
Screws or clamps to secure wood to mold if needed
For the pour:
Epoxy resin — specifically a table-grade or casting resin formulated for deep pours
Slow hardener for large-volume pours (fast hardeners generate excessive heat at volume)
Accurate scale for measuring by weight — do not measure by volume
Mixing containers, stir sticks
Heat gun or propane torch for bubble removal
Nitrile gloves, safety glasses, good ventilation
For finishing:
Random orbital sander
Sandpaper: 80, 120, 220, 400, 800, 1500, 3000 grit
Polishing compound
Table legs and mounting hardware

Step 1 – Design Your Table
Before you touch wood or resin, decide what you're making.
What are the finished dimensions?
A dining table that seats six people needs to be at least 180cm long and 90cm wide.
Conference tables go larger. Coffee tables typically run 90–120cm long.
How wide is the epoxy river? A narrow river — 8 to 10cm — is more subtle and works well with figured wood where you want the wood to dominate. A wide river — 20cm or more — makes the epoxy the visual centrepiece.
Is this a through-river (epoxy goes all the way through the slab from top to bottom) or a surface river (thinner pour on top of solid wood)?
Through-rivers are the classic look and the most structurally sound approach.
What color is the epoxy? Clear, tinted, opaque?
Test your pigment system on a small batch before committing to the full pour. Colors can shift during curing, especially with metallic and iridescent powders.
Step 2 – Prepare the Wood
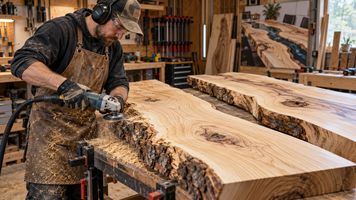
Dry it properly. Check moisture content with your meter. Below 8% is the target. Below 6% is better. If the wood isn't dry, wait. There is no shortcut here.
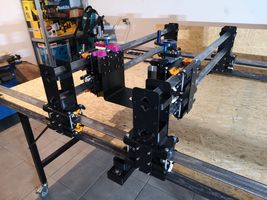
Flatten the faces. The face that will be the show surface needs to be flat and smooth. Run it through a wide planer if you have one, or build a router sled — two parallel rails with a router on a sled that traverses the slab, cutting a consistently flat surface. This step takes time and patience. Do it properly.
Clean the live edges. Remove bark, loose material, and any soft punky wood. A stiff wire brush and a scraper take care of most of it. Some makers leave a small amount of bark for a rustic look, but understand that bark can detach from the epoxy over time. Better to remove it and accept the edge as it is.
Seal the end grain. End grain is porous and will absorb significantly more epoxy than face grain. Seal the ends of your slabs with a thin coat of epoxy before the main pour. Let it cure fully. This prevents end grain from pulling pigment out of the colored pour and blurring the line between wood and resin.
Seal any cracks or voids in the wood that you don't want epoxy to flow into. If you do want epoxy in those voids as part of the design, leave them open.
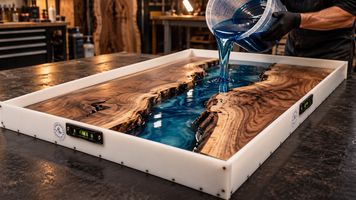
Step 3 – Set Up Your Mold
Level the mold. Epoxy finds its own level — this is physics, and it works against you if your mold isn't flat. Use the built-in spirit level and shim the legs as needed. Check level in multiple directions.
Position the slabs in the mold. The gap between them is your river channel. Make sure the gap is consistent across the length of the table, or intentionally varied if that's your design intent.
Consider how to prevent the slabs from floating. Wood is less dense than liquid epoxy, and a full slab of walnut will want to lift when surrounded by resin. Common approaches: screw through the mold base into the bottom of the slabs (fills the holes later with plugs), use bar clamps, or pour a thin lock-down layer of clear epoxy first and let it partially cure before the main colored pour.
Step 4 – Seal and Prepare for the Pour
Seal the interior joints of the mold with silicone sealant. Even a gap of half a millimeter will leak. Run a bead along every joint where the base meets the walls, and where the walls meet each other at the corners. Smooth it with a wetted finger. Let it cure for a full 48 hours — not overnight, 48 hours or a bit more - even week.
Tape the top faces of the slabs where they meet the mold walls. This keeps epoxy from creeping under the wood-to-mold interface and bonding the slab to the mold.
Do a final level check. Level the mold again after you've loaded the wood and everything is positioned. The weight of the slabs can shift things.

Step 5 – Mix and Pour the Epoxy
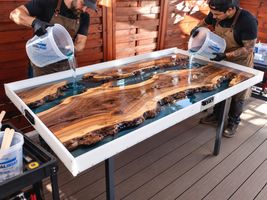
Read the technical data sheet for your resin system. Specifically: maximum single-layer depth, working time, full cure time. These numbers vary significantly between products and matter enormously.
Mix by weight, not volume.
Resin and hardener have different densities. Measuring by volume introduces errors that affect curing. Use a scale.
Mix thoroughly.
Undermixed epoxy — where the resin and hardener aren't fully combined — leaves uncured sticky patches in the finished piece. Mix for the time the manufacturer recommends, scraping the sides and bottom of the container. Then transfer to a second container and mix again briefly. This transfer step catches material stuck to the sides of the first container.
For large pours, work in layers.
Deep pour resins can accept thicker single pours than standard systems, but there are still limits. Check the data sheet. Exothermic heat from thick pours can cause yellowing, cracking, or in extreme cases fire. Better to pour in two layers over two days than to rush a pour that overheats.
Remove bubbles immediately.
Pass a heat gun or propane torch quickly over the surface — not too close, not too long, keep moving. The heat drops the surface tension and bubbles pop. Repeat every 20–30 minutes for the first few hours as new bubbles rise.
Cover the mold loosely to keep dust and debris out while curing. A sheet of plastic, elevated so it doesn't touch the surface, works well.
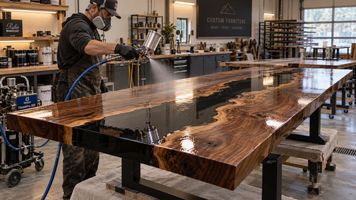
Step 6 – Demold and Finish
Wait.
The resin may feel hard longer. For large pours, wait the full cure time listed by the manufacturer before demolding — typically 3 to 7 days. I do it after 2 weeks for sure.
Demold carefully.
With a good HDPE mold, demolding is usually straightforward — the slab simply lifts out. Tap the outside of the mold if needed. If you've sealed properly and the mold surface is clean, there should be no sticking.
Flatten the top surface.
Unless your pour was perfect and the epoxy absolutely level, the top surface needs flattening. Router sled or wide drum sander, same approach as the wood flattening step. Remove just enough to get a truly flat, consistent surface.
Sand through the grits.
Start at 80 if there's significant material to remove, moving to 120, 220, 400. Then wet sand: 800, 1500, 3000. Each grit removes the scratches from the previous grit. Don't skip grits. The temptation is to jump from 220 straight to 1500 — resist it.
Polish.
A machine polisher with a cutting compound, followed by a finishing compound, brings epoxy to a near-mirror finish. It's satisfying work and the results are worth the time.
Apply finish to the wood.
The epoxy is already sealed and polished. The wood faces need finishing — hard wax oil, water-based lacquer, or oil finish depending on your preferences and the intended use of the table. Stay away from the epoxy edges when applying oil finishes; they can leave a residue on the resin that's difficult to remove.
Attach the legs.
Steel hairpin legs and geometric welded steel frames are popular with river tables and complement the contemporary look. Solid wood legs in a matching species work well for more traditional aesthetics. Whatever you use, make sure it's strong enough — a large slab of wood and epoxy is heavy.
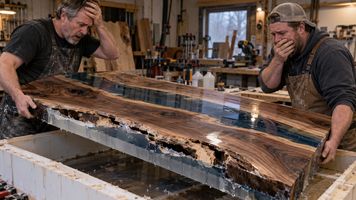
I hope you never find yourself in such a situation ;)
Common Mistakes — What Goes Wrong and Why
Wood that wasn't dry enough.
Bubbling, cloudiness, poor adhesion, cracking over time. The only fix is prevention.
Not sealing end grain before the pour.
Pigment migration into the wood, blurring the resin-to-wood line. Seal end grain first.
Mold that isn't level.
The epoxy runs to one end. You end up with a deep river on one side and a shallow one on the other. Always check level multiple times.
Mold that flexes.
Bowed bottom surface on the casting, uneven river depth. The answer is a rigid mold — which means HDPE, not thin MDF or silicone.
Pouring too thick in one go.
Excessive heat buildup, yellowing, cracking, or worse. Pour in layers.
Not mixing properly.
Sticky uncured patches. Mix longer, use the two-container transfer method.
Demolding too early.
The slab looks cured but the interior is still soft. Wait the full cure time.
Skipping grit stages in sanding.
Deep scratches that show up when you polish. Don't skip.
Where to Get the Right Mold
The mold is the one piece of equipment in this process that directly determines the quality of your finished surface. A flat, rigid mold gives you a flat, clean casting. A mold that flexes, leaks, or transfers texture gives you more finishing work and more frustration.
If you're serious about building river tables — whether as a business or as a serious hobby — a purpose-made HDPE mold is the right investment. It will outlast hundreds of pours, release cleanly every time, and hold its dimensions without flexing.
At hdpemolds.com, we make professional HDPE molds in a range of standard sizes and custom dimensions. Our molds go up to 95" × 48" (243 cm × 122 cm) — large enough for a substantial conference table or a statement dining piece that seats ten. Every mold ships with adjustable leveling feet and a built-in spirit level, because we know how critical leveling is to a successful pour.
We're based in Kraków, Poland, and we ship to over 70 countries. The shop has a 4.9/5 rating on Etsy with Star Seller status — not because we're the cheapest option, but because the molds work and we stand behind them.
If you're planning a project and you're not sure which size to order, reach out. We'd rather spend a few minutes helping you choose correctly than have you order the wrong thing.
Our shops
hdpemolds.com
epoxyprojectsmolds.etsy.com
One last note: every river table in our workshop started as a plan on paper and a slab of wood that wasn't quite ready. The first few builds teach you things no article can. Build one, make mistakes, fix them, build another. The tables get better. So does the process.